Sunday, October 20, 2013

Making Freaks Freakier!!!

     We will be testing some vertical jumps this week as we begin some new phases of our athletes, and this reminded me of a milestone that we had at MADE this summer, (Watch the video of it below)! I get asked a lot by people about what is my greatest achievements with physical results of my clients/athletes. Everyone is obsessed with vertical jump height, 40 times, 60 times, etc. I feel that there are much better ways to evaluate athleticism, however, if you want to survive in this game, you have to give the people what they want. These tests can show valuable information, however most use it as a bragging right, or selling point.
     I've heard, seen people/trainers boast about getting as much as 6-10 inches on a vertical jump in 2 months, but what if I told you that my greatest achievement for an athlete on the vertical jump was 3 1/2 inches in just shy of 3 months. You probably think that I don't know what I'm talking about or you will want to go train with the 10 inch vert. place. Hold on, do not go anywhere yet!
     The 3 1/2 inch vertical jump increase that we improved on was from a highly trained, high level, Division 1 Running Back, who has set rushing records, and achieved rushing titles. Most of the crazy increases that people throw all over Facebook, their website, and use as marketing tools are data that they collected from individuals that have never trained before, or have very little training experience.
     Let me explain...when a person has never trained or has very little training experience they will see dramatic increases due to neuromuscular adaptation, basically the brain telling the muscles what to do, when, and how to do it. The window of opportunity is wide open for these individuals. The more trained an athlete becomes, the smaller that window gets. Again, in the beginning of the training life for an untrained (high school, college) athlete, any external stimuli will increase strength, power, speed, efficiency, etc. You could pretty much have them walk around carrying rocks, and throwing them into a creek and they will get positive gains. It's when a person becomes highly trained, the training protocol must be controlled, well thought out, and properly organized in the program to get maximum results.
     Now let me answer this question again, and see how it sounds to you: What is the greatest test result that you achieved with an athlete? I helped an athlete achieve a 40 inch Vertical Jump, in less than 3 months. I love my job!!!
 
 
Oh, and he also hit a 59 inch Approach Box Jump!!!

Thursday, September 19, 2013

For What & When To Use Wrist Straps


"For What & When To Use Them"

Craig Merrick, CSCS, CPPS, FST


                I see this piece of equipment being used on a constant basis, and they are about to destroy the whole fitness industry. Well it's not that drastic, there are way more non-practical training and exercises that are being used out there that are doing a good job of that. Straps have been around for a long time and can now be bought at most sporting goods stores.  If you are the kind of person that wears wrist straps for every single lift or each workout like they are a piece of jewelry, you may actually be hurting yourself more than helping.  There is no need to wear them for everything and to be honest; we do not even use them much at our facility, if at all.  Instead we use chalk because we are also trying to achieve better grip strength with our athletes.   Hopefully, this article will give you some insight on wrist straps, the lifts you perform where they may be helpful, and ways to strengthen your grip so you don’t have to use this “piece of equipment” so much.   

                Lifting straps assist with grip, which makes the lift easier.  The idea behind them is that they disperse the weight throughout your wrists and forearms, taking some of the weight (literally) out of your hands.  This is great if you are looking to overload a large muscle group, but if you want to achieve a strong grip you are missing out. You should only break these babies out when you are lifting heavy weights on specific exercises and when you don't want grip to be a limiting factor. Straps can be used if you are trying to overload specific muscles during lifts that require large amounts of weights and high percentage sub-max to max effort.  Please do not use them every time you do a pull-up, DB Row, BB Row, Deadlift, Shrug, etc. (the list of exercises I have seen people use wrist straps for could go on and on).   You want to take advantage of the increase in grip strength these exercises also offer. It's a two for one deal.

                When performing lifts like the deadlift, not only does it require tremendous leg and back strength, it also requires hip and upper back mobility along with a lot of grip strength.  The grip strength is what we want to take advantage of during lifts such as these. The stronger your grip strength is, the greater your work capacity. Think of it like this:  the stronger your grip is, the less energy required for the grip and therefore, more energy can be expended by the larger muscles. You can add some grip strengthening exercises into your workouts; however, there is nothing better for grip strengthening than ripping something heavy off the floor, in my opinion.

                I prefer chalk over straps any day for the simple fact that I am getting help with grip, but I am still holding the complete bar weight in my hands since there is no strap distributing the weight elsewhere (wrists and forearms).  Unfortunately, most of the big commercial gyms do not allow chalk. You basically have 3 options at this point, 1) lift light weights and cheat yourself; 2) use straps, but only use them on heavy pulls; or 3) leave that gym and find yourself a warehouse gym.  I realize the majority of you will go with option 2, but seriously consider option 3 as well!

                If you are going to use straps, I recommend using them only when you are performing a heavy pulling DB or BB exercise, or if you are trying to overload a larger muscle group and you do not want grip to be a limiting factor. The following are the exercises that wrist straps are meant to be used for:

·         Heavy Deadlift Variations (Conventional, RDL, DB Deadlifts, etc.)

·         Heavy Trap Bar Deadlifts

·         Heavy BB/DB Row Variations

                As you can see, you should only use straps for when you are performing big weight and big lifts. If you feel the need to use them on other exercises, such as Weighted Pull-ups, BB/DB Shrugs, then only use them when you get to heavier weights and you want to take grip out of it. Basically, try not to use them on your earlier work sets.

One last quick note: Do not use wrist wraps when performing an exercise where grip strength is one of the main focuses, such as a Farmer's Carry.  Grip is a major factor in this exercise, and it plays a vital role in the mental aspect. This type of exercise not only builds great strength but mental toughness as well. When you are performing a farmer's walk and that weight becomes heavy in the hands, it takes a lot to overcome and perform the exercise to its completion with correct technique. Take advantage of all of the benefits that these exercises offer.

                I am not against wrist wraps, I'm just saying that there are times when they can be utilized as a valuable tool, but you should not become dependent on them all of the time. However, I understand if you are a bodybuilder completing high repetitions of exercises, and you are more concerned about working the larger muscles than grip becoming a limiting factor, making you fatigue faster. Wrist straps should be one of those items that you throw in your gym bag and get them out every once in awhile.


Monday, July 22, 2013

Swing Set/Playground/ Vacation Workout

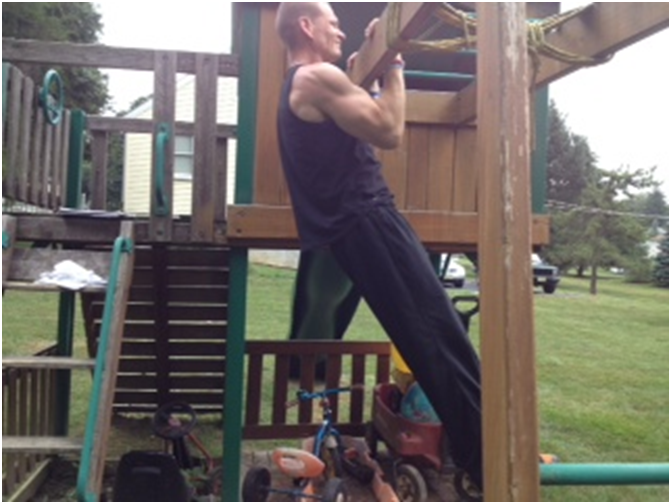
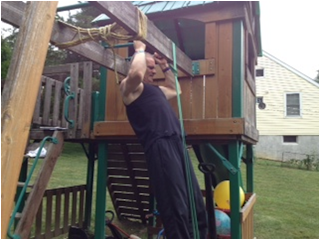
                A swing set is basically an outdoor gym for children. They run around it, climb on it, jump off of it and the best part about it is that they have a blast doing it.  Well, adults should also get back on the swing set. We aren't going to be going down any slides or swinging, but we can turn the average swing set into an outdoor workout. The possibilities are endless so use your imagination on the swing set in your backyard or at the playground and hopefully you can build new workouts off of this program.
                Your average backyard swing set, or park playground is a workout oasis. You can do pull-ups and chin-ups by hanging on the monkey bars or somewhere on the swing set. You can use it to perform inverted push-ups, feet elevated push-ups, planks, etc. You'll be able to find spots where you can do inverted rows and all other bodyweight exercises can be done right in the area of the swing set. You have the equipment, now you just need the program. This is where you can get most creative with your sets, reps, rest, and exercises.
                I'm going to help those that are confined to the house because they have young children, for those who don't want to go to the gym, for those that want a restoration work out, and even those under house arrest. I woke this morning and decided to workout at home rather than make the trip to the gym. I setup a program that could be done outside on the swing set while the kids played right around me. Everybody was happy!!!
                I love bodyweight exercises because they use relative strength. Relative strength is basically the strength that we have in relation to our own bodyweight. How many times you can push or pull your own body. Leaner/smaller individuals have much greater relative strength than those with bigger/ heavier body structures. However this can all be changed by simply performing bodyweight exercises in your programs. They are not only great for developing strength, but also teaching the body to work as 1 unit. Most importantly is that bodyweight exercises are safe. If you can lift your bodyweight you'll be able to perform the exercise, but if you can't, then you can't. When you can't do a specific exercise that you lack the strength for, you can simply regress them. I've included some regression exercises for the workout that I am giving you.
                Get outside and get some exercise will ya! This is the program that you can try and complete in about 30 minutes or less, not including warm-up. I've included pictures of the exercises and also regressions for them. Give it a try, I know you will enjoy it! Of course, you will need to perform a proper warm-up before proceeding to the workout.
1) 50 Chin-ups/Neutral Grip Pull-ups
2) 100 Tricep Push-ups
3a) 50 Inverted Rows
3b) 100 Body Squats
4a) 100 Feet Elevated Push-ups
4b) 50/leg Bodyweight Reverse Lunges
                This is a rep based workout whereas you must complete all of the reps for an exercise before you move onto the next one, unless you are supersetting (active rest). You'll notice 3a, 3b, 4a, 4b in the program. This simply means that you'll perform Body Squats while you are resting from doing inverted rows, and the same goes for 4a and 4b.
                If you are a beginner you can simply cut the reps in half for each exercise and progress yourself up to the desired reps. Also, you may need to regress the exercise and do an easier form of it until you are able to eventually perform the full exercise for the desired reps. Your strength will come quick, especially if you are a beginner, so be patient....remember quality reps over the quantity of reps. You will get there, I promise. Your workout may look like this:
1) 50 or 25 Banded Chin-ups/Neutral Grip Pull-ups
2) 100 or 50 Inverted Tricep Pushups/Tricep Push-ups on knees
3a) 50 or 25 Knee Bent Inverted rows/or do T, Y, W's ( from another blog)
3b) 100 or 50 Body Squats
4a) 100 or 50 Inverted Push-ups/ Push-ups on Knees (see Push-up Blog)
4b) 50/leg or 25/leg Bodyweight Reverse Lunges
Exercises:
*Banded Chin-ups- I use a resistant band which will help with assistance, especially at the bottom of the movement where most help is needed for banded chin-ups. You can now buy these bands at Sport's Authority, Dick's or online. They can be used for many different exercises.
Chin Up


 Neutral Grip Pull Up


Banded Chin Up


Banded Neutral Grip Pull Up


Tricep Push Up


Tricep Push Up on Knees


Inverted Tricep Push Up


Inverted Rows


Knees Bent Inverted Rows


Body Squats


Feet Elevated Push Ups


Push Ups on Knees


Inverted Push Ups


Body Weight Reverse Lunges

Saturday, June 22, 2013

     Most people have jobs that cause them to be in a constant state of shoulder internal rotation, the shoulders pulled forward and the thumbs pointing in and downward. Think about what you do for the majority of your work day and think about how your shoulders are and see if those thumbs are pointing to each other. If you work a job that requires sitting at a desk, using a computer, driving a lot: a mechanic, a masonry  laborer, a barber, a teacher, a surgeon, the list could go on for awhile. You also see this phenomenon in kids today. They are texting, on the computer, or playing video games with their shoulders rolled forward. This can even go for all of us overgrown teenagers!
     The biggest problem is not only the positioning of our upper torso, but that we do it on an every day basis. It's the repetition that kills us. One of the amazing abilities of the human body is adaptation. The body goes through several phases before it adapts to a new movement pattern, a strengthening aspect, etc. The problem is that once our bodies adapt and if we keep doing the same movement, or stay in a constant bio mechanical state, we venture into what is known as overuse. Overuse is the culprit of many of your nagging and aching pains in your shoulders, upper back area, and even down into elbows and wrists. We can fight this by simply un-doing what we've done all day.
     If our jobs cause us to be in constant shoulder internal rotation the body adapts by causing anterior deltoid (front of the shoulder) and chest muscles to become tight. Along with tightness in the chest comes weakness in the upper back and neck area.  Because of this we lose shoulder mobility. All of this combined is what needs to be addressed through mobility exercises--proper range of motion exercises that will address mobility and flexibility, along with strengthening the upper back (scapulae) region.
     We need to address this by using exercises that will cause the shoulder to externally rotate, thumbs away from the body and/or an overhead pulling motion. Here is a video of 3 exercises that we use with our clients to help them prevent pain or become pain free. Doing a few sets of these exercises along with other methods that we use will help un-do what you've done all day! These are great starter exercises: start by doing 3 rounds of 5 reps each, and work your way up to 10 reps over a few weeks.
      This is just one installment of many to come teaching you how to correct your posture and detailing ways to help you become pain free through exercise and science. I will be talking more about the shoulders and also how to un-do our hips from sitting for long periods of time.


Sunday, March 17, 2013

Train Right To Be MADE


My 8 year old daughter and I were talking one night:  she was telling me about how they do pushups in gym class and how she is strong. My question to her, "Do you do them like I taught you?"  Her reply, "We are not allowed." Either the protective father, or the insane strength coach came out, because I was pretty heated. When she showed how the teacher wanted them to do them I should have known that they would be the typical garbage pushup you pretty much see everyone do, elbows flaring out and backs dipping. And get this, they are not allowed to go to their knees!  So you can only imagine all of the back arching going on. These are the type of things that set up poor movement patterns and can lead to future injuries for certain.

Think about this for a moment:  if a kid is active in sports and other strenuous activities he/she will be performing pushups from as young as 5 years of age all the way through high school and possibly college (well, I hope it gets corrected before it gets this far).  That's thousands of repetitions of shoulder-grinding-low-back-straining garbage pushups over a long period of time. The proper way of doing a pushup will reduce the glenohumeral head from slamming against your rotator cuff time and time again, reducing rotator cuff injuries and  labrum tears.

I put together this short video in the hopes it may educate you, and prevent poor movement patterns, and future injuries, aches, and pain. We need to go back to the basics before we can move forward. The video will demonstrate how to set your arms when in the pushup position to protect your shoulders and also, how to lock your low back down from it arching. I will also demonstrate two (2) regressions that we use at our facility, MADE Strength & Conditioning, to help those that do not yet have the proper strength to perform an actual body weight pushup.

Body weight exercises are very important because they develop one's relative body strength. This means that your strength is equal to and/or greater than your body mass. Body weight movements also teach your body how to move as one unit without parts of the body being pinned down on a bench, floor, etc. If you do not already do so, you need to include push-ups and other body weight movements into your workouts.

Remember, we need to be able to do these basic movements before we can progress to more advanced methods of strength training. The push-up is the basis for a majority of your supine (lying on your back) pressing movements. Get great at push-ups, and you'll see improvements in your bench strength and bench technique, and overall athleticism.

Train To Be MADE!!!